Hypertufa Textures
Rustic Craft Techniques for added charm...
Hypertufa is by its very nature a rustic and appealing material, and you can either accentuate this characteristic or diminish it just by using different ways of adding texture.

Some of the simplest ways of increasing the depth of the patterns in hypertufa are in the choice of molds, and what you use to line them with. These pictures illustrate the extreme options of what the outside of the pots will look like, just from changing the thickness of the liner;
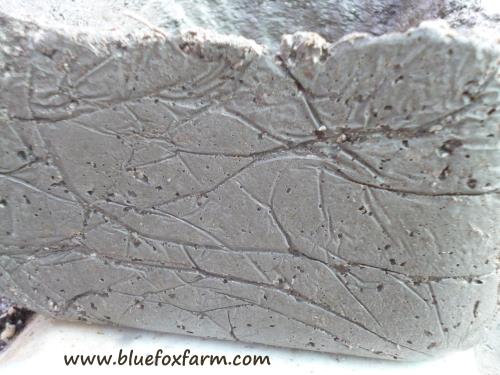
Using the thinnest of poly film, such as the most economical grade of painters drop sheets, dry cleaning bags or cheap black plastic garbage bags, the lines are fine and not very deep.

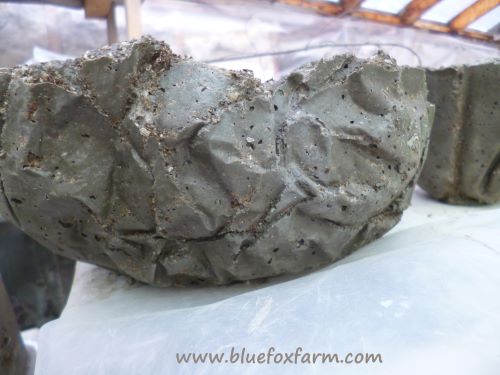
This small pot was made with an ice cream bucket lined with heavier grade poly. The lines and creases are accordingly deeper and there are less of them.

Here are four examples of the same kind of mold, and the differences that it can make with the different grades of plastic liner. Can you tell which was made with the thinner poly, and which was the thickest?

Deep crevices, and not much other texture is the result of using six mil poly, which is used for vapor barrier in building projects.
The small size of the mold, combined with the thickness of the poly makes the creases quite large, adding to the elegance of this pot.

The texture on this Faux Wood Planter is made by lining the inside of the plastic mold (a bowl) with screwed up small paper bags, then that is lined in turn with light poly film, then the pot is made.

This millstone is patterned after the original stone kind used for milling grain; the textures can be simple or complicated, leading to a lot of scope for experimentation.
Sculpt hypertufa when it's leather hard, don't wait for it to fully cure. The 24 hours after forming it is best.
Other projects that turned out completely differently than I imagined were those lined with bubble wrap.
I never dreamed that they would look this way. The pot above was made with the smallest size bubble wrap on the inside of the mold...
...and this one was the large sized bubble wrap, with bubbles about an inch across. It's super chunky!

Baskets can be used for molds too - and guess what? The finished project will be textured just like a basket.
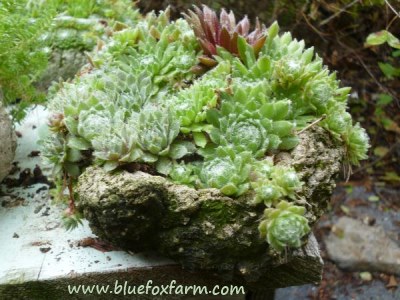
The nice thing about hypertufa is that it's almost fool proof. Even projects that at first didn't seem to be working suddenly spring into life once finished.
There are very few of my pots that don't look completely different with plants flowing over the edges, and if all else fails, they can be partially buried, or added on to with more mix - using texture, of course, to camouflage your mistakes.
Ready to Take Your Hypertufa to the Next Level?

Learn what it takes to be creative - we all have the gene but how do we develop it? Get the free guide!
Fill in the form below for your copy;
(Don't be disappointed - use an email address that will accept the free download - some .aol email addresses won't.
If you don't see your download within a few minutes, try again with another email address - sorry for the bother.)


Popular Posts;


Woman of Many Sticks - find out why I'm called that...
Join my e-mail group;
Sign up for the Rurality Newsletter here: (click on the bucket!)

Blue Fox Farm Home | About Me | Contact Me | Site Map | Privacy Policy | Copyright
Copyright © 2002- BlueFoxFarm.com All rights reserved
