
Get the e-Book
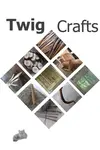
Come into the garden and find some twigs - then, let's build! They can be rugged and rough, or more refined and smooth.
Whatever they look like, there's a craft for that.
Faux Tin Tiles
Pressed Tin, Revisited
Jacki Cammidge, The Woman of Many Sticks, is a participant in the Amazon Services LLC Associates Program, an affiliate advertising program designed to provide a means for sites to earn advertising fees by advertising and linking to amazon.com. The cost to you, if you purchase something through my link, is the same.
A DIY Tutorial for making your own Faux Tin Tiles for a vintage look - these are easy to make with just a few supplies but a deceptively complicated-looking result.

The picture here is of some real tin tiles, and were a selling feature of this ramshackle house in Grand Forks.
In houses built around the late 1800's to the 1900's, pressed tin ceiling tiles were a common form of decoration.
If you find any of these at an auction or in a flea market, grab them!
They're getting more rare by the year, and soon the only way to have this look will be to make your own.

When we visiting our friends in New Brunswick who run a potter business, I was thrilled to see that the 100 year old farmhouse they live in had tin tiles in many of the downstairs rooms.
There were several different designs, including one room where the inner tiles were outlined by some in a totally different style. I took pictures, of course, but you would be amazed at how difficult it is to take good pictures of ceilings. Here is a slideshow with more.


Never one to let the moss grow under my feet, I discovered a way of making something similar but as usual, I had to give it my own twist.

The thin aluminum sheets that are meant to protect the bottom of your oven from splashes and spills, or disposable cookie sheets are a thickness between chimney or roof flashing, and aluminum foil.
The two that I got are packaged together, for about $4, but you may find something cheaper in the dollar store.

There are two sides to the aluminum sheets; you will get a different look by using the tool (a knitting needle) to score the lines (here, freehand) on either side.
Use a folded towel underneath, so the needle doesn't poke through.
The tin (aluminum) is quite tough and will withstand a fair bit of rough treatment.

The important thing to remember is not to press too hard; many smaller, lighter strokes are better than trying to rush through it.

Simple and repetitive designs give a feeling of cohesion. This will be a triptych, or three panels, all with different but nature based designs.

I had a lot of fun with the design of trees; they are amazingly easy to do, and even the simple lines actually do have the depth and texture of the bark.

Another close up of the different styles of leaves; some were made to resemble willow leaves, with a simple tear drop shape; the ferny ones were outlined after the veins were done on one side of the tin, and then the scalloped edge was done on the other.

These are a lot of fun, but intensive to work on. The trick, as with any of these kinds of crafts, is to know when to stop before you've overdone it. That's the secret of a deceptively complicated result.
You might like these
Twig Crafts - primitive, natural art made with branches and twigs
Twig Craft Projects From Natures Supply Cupboard - DIY Ideas
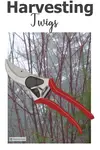
Harvesting Twigs for Crafts; the most important things to know
How to Harvest Twigs for Crafts; the how to primer for collecting twigs efficiently and safely
About Me - how this whole thing started
Find out about Jacki; who is she, and why is she so fanatical about rustic crafts?

If you're curious how broken pots, twigs and wire combine into magic, let's explore creativity in action.
Fill in the form below for your copy;
(Don't be disappointed - use an email address that will accept the free download - some .aol email addresses won't.
If you don't see your download within a few minutes, try again with another email address - sorry for the bother.)


Popular Posts You Can't Miss


Woman of Many Sticks - find out why I'm called that...
Join my e-mail group;
Sign up for the Rurality Newsletter here: (click on the bucket!)

Blue Fox Farm Home | About Me | Contact Me | Site Map | Privacy Policy | Copyright
Copyright © 2002- BlueFoxFarm.com All rights reserved

We acknowledge the traditional owners and custodians of the lands on which we live and work and pay our respects to elders past, present and future. Our business is created on the Mi’kmaq lands we call Epekwitk.