- Home
- Hypertufa Projects
- Hypertufa Pinch Pots
Jacki Cammidge is a Certified Horticulturist and rustic garden artisan with 30+ years creating twig trellises, archways, and hypertufa pieces from natural materials.
Hypertufa Pinch Pots
Make Tiny and Unique Planters
for Hardy Succulents, Alpine Plants or Moss
I spent about an hour making hypertufa pinch pots, just to see how doable it was.
I had so much fun with this rustic garden craft, I went back and did some more!

Don’t be intimidated by the thought of this project – if you just make up a small amount of the mix, it’s easy to make eight or so of these fun and unique planters, without it becoming a chore.
See more instructions in the column to the right;
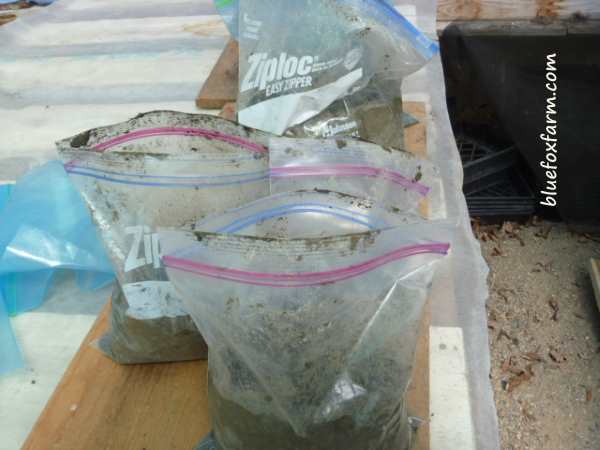
Save up your Ziploc bags, rinse them out first, and when you have eight or ten saved up, it’s time to make some hypertufa.
The sandwich size is perfect for little gem-like displays of your favorite hardy succulents, moss or other alpine plants.
The slightly larger sized bags will make a little group planting for several different kinds planted together - texture is the key here.
Make sure you put a drainage hole in the bottom; they only hold a few teaspoons of soil, but you don’t want it waterlogged.

Make the hypertufa mix; I use a 1:1:1:1 mixture of sifted peat moss: builder’s sand or sandblasting slag: Portland cement powder: and perlite.
There are many other recipes out there, but this one seems to work fine without any fiddling about.
I made a scoop out of a detergent container to use as a measure for one part of each ingredient.
Before you start, see the instructions on the Hypertufa How To and How to Make Hypertufa pages.
Once your mixture is ready, with the water added and thoroughly mixed up, put a couple of handfuls into each bag.
Pack the mix up the sides, making a depression in the middle. Aim for equal thickness all around, and then poke your finger into the middle of the bottom of it to make a drainage hole.
Push the sides of the bag down into the center, and cover with cardboard, Styrofoam or other material to shade it and keep from freezing.
 As winter arrives, the pinch pots can be placed in an out of the way garden bed; covered with a blanket of snow, they'll survive without cracking
The next day, you can remove the bags; usually you won’t be able to retrieve them; sadly, they’re a single use item.
Clean off any excess hypertufa, such as the bits that go into the corners of the bag; brush carefully with a wire brush if you wish, and clean out the drain holes with a drill bit, large nail or stick.

Completely immerse the hypertufa pinch pots in a bucket of water. They should stay in the water, which you can change periodically, for at least one to four weeks. By that time they’ll be fully cured, and stable, ready to plant.
Omit the curing step at your own risk, as the concrete won’t be very strong and the pots will be brittle or crumbly.
 Displayed on an old bed frame, these hypertufa pinch pots show off happy hardy succulents
Once the long wait is over, plant up some Sempervivum, Jovibarba and Sedum into your special little hypertufa pinch pots and display them on staging, steps or right in the garden on mulched beds or the top of a rock wall. With their rustic and weathered appearance, they’ll blend right in.
See the page on How to Make Hypertufa Look Old for some ideas on weathering your pots.
For some other tiny hypertufa pots look here: Hypertufa Hands.

Ready to Take Your Hypertufa to the Next Level?

You might like these
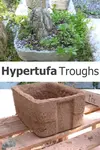
Hypertufa Troughs; a tiny mountain side in miniature
Hypertufa Troughs are a rustic and rugged way to make a mountainside garden in miniature; alpine plants, succulents and tiny trees all thrive in the microcosm
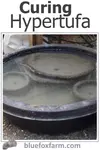
Curing Hypertufa; Prevent Cracks & Boost Durability
New to hypertufa? This curing hypertufa guide shows how to slow-dry your piece with plastic, shade, or a water bath so it cures tough and lasts.
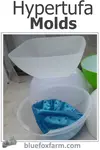
Hypertufa Molds for DIY Planters: Salvage & Texture
Make one-off planters with hypertufa molds like baskets, bowls, buckets, and earth forms. Learn when to use Pam, plastic film, or sacrificial molds.
 Jacki Cammidge
AUTHOR BIO
Jacki Cammidge is a Certified Horticulturist with a diploma in Ornamental Horticulture and the rustic garden artisan behind Woman of Many Sticks. Over 30+ years, she built custom twig trellises, archways, clematis gazebos, and 100+ hypertufa pieces using natural materials and upcycled finds. See her work on Facebook and Pinterest. Now retired, she still loves growing and harvesting willow.
If you're curious how broken pots, twigs and wire combine into magic, let's explore creativity in action.
Fill in the form below for your copy;
(Don't be disappointed - use an email address that will accept the free download - some .aol email addresses won't.
If you don't see your download within a few minutes, try again with another email address - sorry for the bother.)


Popular Posts You Can't Miss


Woman of Many Sticks - find out why I'm called that...
Join my e-mail group;
Sign up for the Rurality Newsletter here: (click on the bucket!)

Blue Fox Farm Home | About Me | Contact Me | Site Map | Privacy Policy | Copyright
Copyright © 2002- BlueFoxFarm.com All rights reserved

We acknowledge the traditional owners and custodians of the lands on which we live and work and pay our respects to elders past, present and future. Our business is created on the Mi’kmaq lands we call Epekwitk.