- Home
- How to Make Hypertufa
- Curing Hypertufa
Jacki Cammidge is a Certified Horticulturist and rustic garden artisan with 30+ years creating twig trellises, archways, and hypertufa pieces from natural materials.
Curing Hypertufa
Slow-Dry Steps for Strong Planters
There are several ways of curing hypertufa.
The different methods all achieve one end – slow drying of the mixture from a mud like consistency to a hard and weatherproof material

Slow and steady is the mantra – drying too fast will only make the item brittle and possibly crack in ways that are not salvageable.
How disappointing that would be if your unique garden art fell apart! It is one of the most disheartening things, which I've personally experienced. Use these methods to make sure you avoid this problem.
Once completely dry and cured, the item will be strong and impervious to moisture.
Here’s How to Cure Hypertufa:
In many cases, simply wrapping plastic film around and over the object will enable it to dry slowly, but in excessive heat and dry conditions something more is needed.
Damp canvas or burlap will hold in the moisture allowing the piece to dry slowly.
Always keep the pots in the shade, as the uneven heat from direct sunlight will crack the item for certain, even under plastic wrap.
Some hypertufarists use a water bath to cure smaller pieces, by immersing them in a bucket of clean water for up to two weeks or longer.If your pieces are bigger, use a rubbermaid tub such as a horse feeding trough, a laundry tub, or even a piece of plastic spread over the wheelbarrow to hold the water. It might take a while for the curing process to be completed, so make sure you're not going to be needing it anytime soon!
This is how I prefer to do it; use rainwater, or out of the garden hose if that's all that's available, change the water a few times, as it will get slimy. After a week or so, take the piece out and let it dry. They will still be a bit fragile so handle with care.
Thicker pieces will take longer to cure, which causes the concrete mixture to heat up, but once completed, the process will ensure that it's at full strength.

If you use a mold, once the pots are dry enough to handle and can be easily removed from the mold, use the water bath method for small pots.
For hand formed items, with no mold, just immerse them in water after they dry under plastic overnight.
Brush the outside of the item to make it appear rustic and aged, and then place it carefully in the water bath.
To age your hypertufa project and give it that antique appearance, look at the page on how to make hypertufa look old.

Some people claim that it's important to leach out the alkalinity from the piece before planting, but I know you'll be eager and impatient to plant them; this is fine.
By the time the roots get close to the sides of the pot, the leaching will have occurred naturally, with rainfall and watering of the plant. If you're really concerned, put a few drops of vinegar in a final bath which will neutralize it. Rinse well before planting to make sure it hasn't altered the pH of the walls of the planter.
You might like these
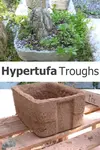
Hypertufa Troughs; a tiny mountain side in miniature
Hypertufa Troughs are a rustic and rugged way to make a mountainside garden in miniature; alpine plants, succulents and tiny trees all thrive in the microcosm
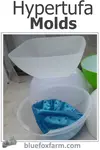
Hypertufa Molds for DIY Planters: Salvage & Texture
Make one-off planters with hypertufa molds like baskets, bowls, buckets, and earth forms. Learn when to use Pam, plastic film, or sacrificial molds.
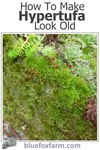
How to Make Hypertufa Look Old; weathering and aging techniques
A rustic garden art tutorial...How to Make Hypertufa Look Old
Getting Started With Hypertufa - sign up here!

 Jacki Cammidge
AUTHOR BIO
Jacki Cammidge is a Certified Horticulturist with a diploma in Ornamental Horticulture and the rustic garden artisan behind Woman of Many Sticks. Over 30+ years, she built custom twig trellises, archways, clematis gazebos, and 100+ hypertufa pieces using natural materials and upcycled finds. See her work on Facebook and Pinterest. Now retired, she still loves growing and harvesting willow.
If you're curious how broken pots, twigs and wire combine into magic, let's explore creativity in action.
Fill in the form below for your copy;
(Don't be disappointed - use an email address that will accept the free download - some .aol email addresses won't.
If you don't see your download within a few minutes, try again with another email address - sorry for the bother.)


Popular Posts You Can't Miss


Woman of Many Sticks - find out why I'm called that...
Join my e-mail group;
Sign up for the Rurality Newsletter here: (click on the bucket!)

Blue Fox Farm Home | About Me | Contact Me | Site Map | Privacy Policy | Copyright
Copyright © 2002- BlueFoxFarm.com All rights reserved

We acknowledge the traditional owners and custodians of the lands on which we live and work and pay our respects to elders past, present and future. Our business is created on the Mi’kmaq lands we call Epekwitk.