Organizing Craft Supplies
Ideas On How To Keep Your Hoard Tidy
Jacki Cammidge, The Woman of Many Sticks, is a participant in the Amazon Services LLC Associates Program, an affiliate advertising program designed to provide a means for sites to earn advertising fees by advertising and linking to amazon.com. The cost to you, if you purchase something through my link, is the same.
You're a crafter, you know the frustration all too well.
You're inspired to start a new project, but before you can begin, you spend an hour searching for that specific shade of ribbon, the right size needle, or those buttons you know you bought last month.
Sound familiar? A disorganized craft space doesn't just waste time—it kills creativity and makes crafting feel more like a chore than a joy.
The good news is that with the right organizational strategies, you can transform your chaotic craft area into an efficient, inspiring workspace where everything has its place and you can find what you need in seconds.
Here's how to get your craft supplies organized once and for all.
Start with a Complete Inventory
Before you can organize anything, you need to know what you have.
Set aside a few hours to pull out all your craft supplies from every drawer, closet, and corner where they've accumulated. This might seem overwhelming, but it's essential.
As you gather everything, sort items into broad categories: paper products, adhesives, fabric and notions, paints and brushes, tools, embellishments, and so on.
This process serves two purposes.
First, you'll likely discover supplies you forgot you owned, which can save you money on future purchases.
Second, you'll be able to purge items you no longer need—dried-up markers, tangled thread, or materials from abandoned hobbies.
Be honest with yourself during this step. If you haven't used something in two years and can't envision a specific project for it, consider donating it to a school, community center, or fellow crafter.
Choose the Right Storage Solutions
Once you know what you're working with, it's time to select appropriate storage. The key is matching the storage method to the specific type of supply.
Clear containers are your best friend for most craft supplies. Being able to see what's inside without opening every box saves enormous amounts of time. Use clear plastic bins, jars, or drawer organizers for items like buttons, beads, ribbons, and small embellishments.
A mason jar storage rack will work perfectly, as well as add a rustic feel to your space.
Vertical storage maximizes space and visibility.
Wall-mounted pegboards are perfect for hanging scissors, rulers, and other tools.
Stackable drawer units work well for paper, stickers, and stamps.
Magazine holders or file organizers can store paper, fabric pieces, or coloring books upright where you can easily flip through them.
Bussing tubs will keep like items together, or act as a catch all for projects on the go.
Specialized organizers exist for almost every craft supply imaginable.
Thread racks keep spools tidy and prevent tangling.
Marker caddies hold pens upright so you can see every color at a glance.
Compartmentalized boxes are ideal for jewelry-making supplies, keeping different bead types separated but visible.
Implement a Logical System
Having the right containers is only half the battle—you need a system that makes sense for how you actually work.
Group supplies by project type if you tend to focus on one craft at a time. For example, keep all scrapbooking supplies together, all knitting supplies together, and so on.
Alternatively, organize by supply type if you use the same materials across different projects.
All adhesives in one area, all cutting tools in another, all embellishments together.
This works well if you're a multi-craft enthusiast who jumps between different types of projects.
Within each category, arrange items by color, size, or frequency of use.
Keeping your most-used supplies at eye level and within easy reach makes your crafting sessions more efficient. Less frequently used items can go on higher shelves or in harder-to-reach spaces.
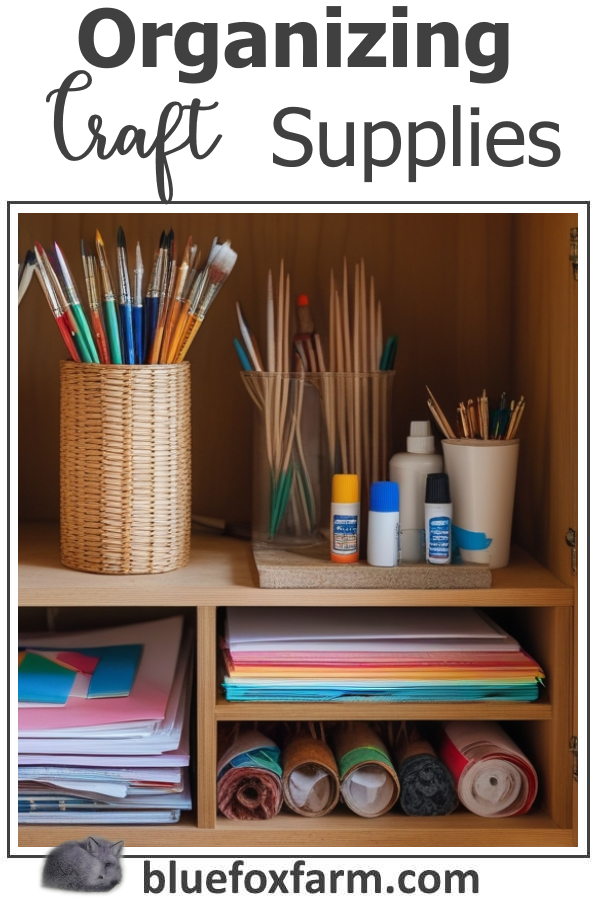
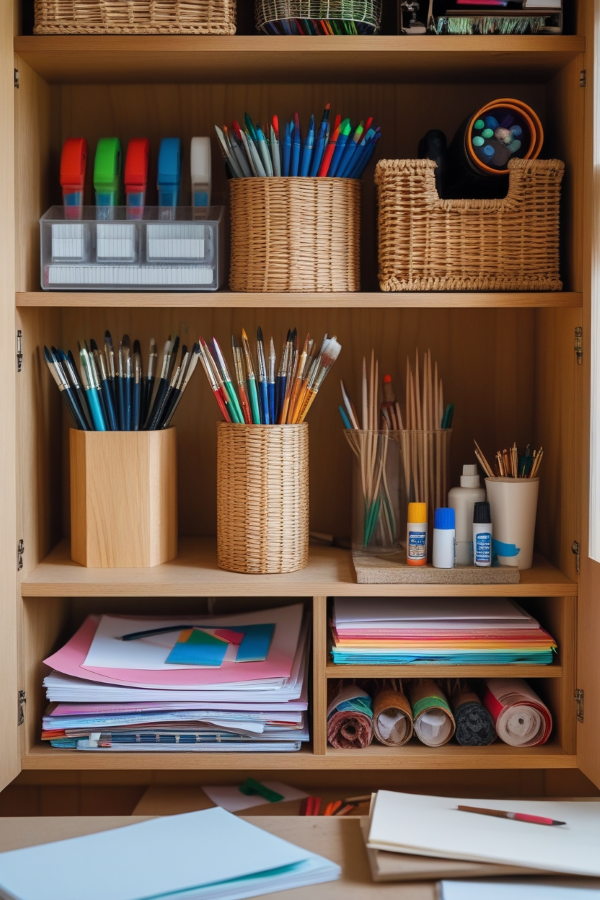 An organized craft supply cupboard with wooden shelves and wicker containers, filled with an assortment of pens in a wooden pen holder, an array of paintbrushes in a cylindrical vase, knitting needles in a woven basket, glue sticks and scissors in a small plastic container, and paper supplies such as colored sheets and notebooks stacked neatly on the shelves. This is the goal.
Label Everything
This step seems tedious, but it's absolutely crucial for maintaining your organizational system long-term. Label every container, drawer, and bin clearly. Use a label maker for a polished look, or simply write on masking tape with a permanent marker.
Labels serve two purposes: they help you find things quickly, and they make it easy to put things back in the right place. When you (or family members helping to tidy up) know exactly where something belongs, your system stays organized with minimal effort.
Create a Portable Kit
Even with a beautifully organized craft space, you might want to craft in different locations—at the kitchen table, outside on nice days, or while traveling.
Create a portable kit with basic supplies you use for most projects. A tackle box, tool caddy, or craft tote can hold essential items like scissors, glue, tape, basic tools, and a small selection of frequently used materials.
This prevents you from constantly raiding your organized storage and disrupting your system.
Maintain Your System
The final and most important step is maintenance. Set a reminder to reorganize every few months, putting stray items back where they belong and reassessing what's working and what isn't.
After each crafting session, spend five minutes returning supplies to their designated spots. This small habit prevents the gradual slide back into chaos.
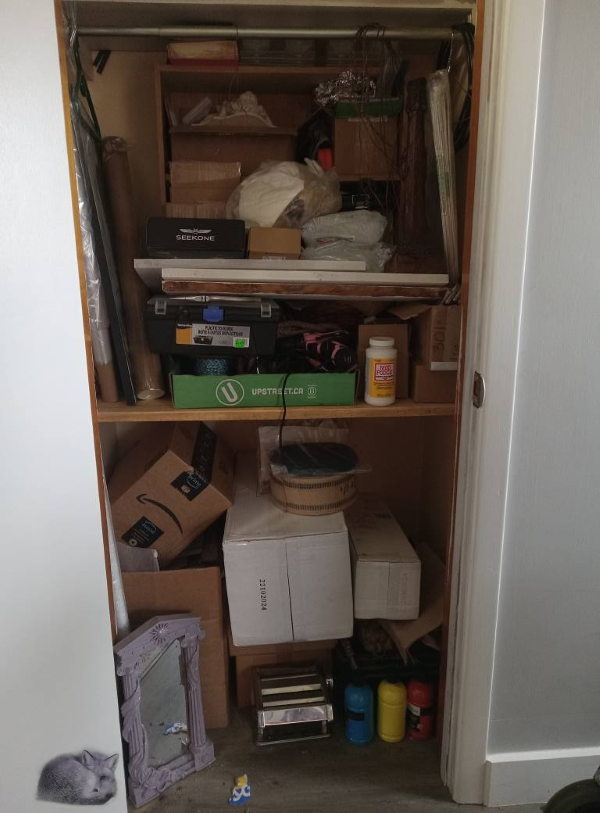 Organizing Craft Supplies - the before. This is where I start. With some help, and keeping the puppy occupied, it will get done.
An organized craft space isn't just about aesthetics—it's about respecting your creative time and making it as easy as possible to dive into projects when inspiration strikes. With these strategies, you'll spend less time searching and more time creating, which is what crafting is really all about.
If you're curious how broken pots, twigs and wire combine into magic, let's explore creativity in action.
Fill in the form below for your copy;
(Don't be disappointed - use an email address that will accept the free download - some .aol email addresses won't.
If you don't see your download within a few minutes, try again with another email address - sorry for the bother.)
