Crackle Paint Technique
How To Crackle Paint - Weathering, Distressing & Antiquing Rustic Crafts
Jacki Cammidge, The Woman of Many Sticks, is a participant in the Amazon Services LLC Associates Program, an affiliate advertising program designed to provide a means for sites to earn advertising fees by advertising and linking to amazon.com. The cost to you, if you purchase something through my link, is the same.
Crackle finish was a trend for all kinds of primitive country crafts a few years ago, and then the craze went away. Now, crackling up your crafts has come back into fashion.

And for good reason. I still use this finish on some things, and I like it even better if I can find a piece of furniture or a door that has this look naturally.
These pieces should be treasured, not stripped down for repainting.
The genuine article is impossible to really copy, so a piece with natural crackling should be kept that way.
You don't have to wait years to get this same appearance of age and patina.
Here’s what I’ve found to emulate that look and reproduce it with some simple ingredients and methods. Even though you'll never be able to copy it exactly, it still gives a great old looking appearance to wood objects and furniture.
On a road trip with friends we went to a very funky commune with many unique buildings. This lovely old door was part of the outdoor kitchen which was used all summer. In winter, they closed down and moved into town to stay.
 The genuine article - a crackled door, aged and weathered by nature
In a visit to New Brunswick to friends who own Clay Design Inc pottery this was found in the century old farmhouse bathroom. So amazing to see the original finish, in these days of rip and tear and renovate.
 Genuine crackled paint in a century old farmhouse in New Brunswick
The way it happens naturally is by years of exposure to sun, rain and cold, in quick succession.
Some colours seem to crackle more, but a lot depends on the type of paint. It's also likely that in previous years not so much emphasis was placed on the preparation, leaving raw wood (which possibly contained waxy resins) to age differently.
The use of TSP or other grease fighter to prep the wood was unheard of, so there was likely other grease, or even dust, that made the crackling happen.
Supplies for Crackle Paint Techniques for your crafts:
1. Crackle Medium: This is the first step for creating the same look as an old farmhouse door. When you first apply it, with a brush or roller, it doesn't look any different. But wait! After you paint on the second layer of paint, that's when the magic happens and the paint crackles in lines and swirls.
2. Base Paint: The base paint is the first layer of paint that you apply, and it will become the color of the cracks.
3. Top Coat Paint: This is the top layer of paint, which will crack to reveal the base paint. This should be a different color from your base paint to achieve the maximum crackle effect.
4. Brushes: You will need brushes to apply the paint and crackle medium. It's recommended to have at least two sizes: a larger one for the initial base coat and a smaller one for delicate crackling works.
5. Palette or Mixing Tray: Use this to mix your paint and crackle medium.
6. Sealant: Once you've applied your crackle paint, you can seal it with a clear sealant to protect the effect.
7. Sandpaper: If you're working with a piece of furniture or a frame, you might want a slightly distressed look. Sandpaper can help you achieve this effect.
8. Drop Cloth or Newspapers: Protect your surface from spills or drips while you're working.
9. Water: You'll need clean water for cleaning your brushes.
10. Rags or Paper Towels: These are for wiping up any spills, and also for blotting your brushes if necessary.
Remember, the key to crackling is patience. Crackle medium needs to dry completely before the top coat is applied, and the crackle effect won't appear until the top coat begins to dry. So take your time and enjoy the process!
You'll need several colours of acrylic craft paint, found at dollar stores everywhere. Buy new stock as it does have a 'best before' date.
In other words, pay full price vs. clearance and don't be disappointed when the paint comes out in a sticky glob.
Cut to the chase to the most economical way to crackle your crafts, with Elmer's White Glue, commonly found in box and stationery stores. I've tried it against all kinds of expensive crackling mediums, and honestly? It's just as good.
Get your pieces of carpentry scraps together – if you’re making a rustic wooden box, attach the pieces first before you paint, as it’s easy to scratch the finish (rustic is the look we’re after, but this may be a bit much!).
You’ll also need some fine grade sandpaper; a tack cloth or two; several paint brushes in different sizes and a drop cloth or newspaper to work on.
 Crackle paint finish, with the paint just applied
 Once the paint starts to dry, the crackling appears
How To Crackle Paint
First paint the board with a base coat of acrylic craft paint.
This can be any colour you like (or even one you don’t, as only tiny amounts of this will show).
Allow to dry thoroughly, overnight if possible. You can omit this step if you want just the wood colour to show through.
Sand the board to remove any dust that may have stuck to the paint, and wipe with a tack cloth.
Dribble the Elmer’s White Glue or crackling medium of choice onto your prepared board, liberally.
Using a slightly damp paint brush spread the glue around until the board is covered.
Now dribble the acrylic paint in your choice of colour over the glue or crackle medium.
With a barely damp clean paintbrush, using strokes down the length of the board with the grain cover the glue completely.
Here's what you'll need for this project - buy them from Amazon.I generally buy my acrylic craft paints at the dollar store, but if you don't have one locally, order them online here
If you're not keen on trying the crackling medium, Elmers glue is a great, very economical option. Get that here
Crackle medium
Allow to dry, and watch if you like for the crackling to appear as the paint dries. This method results in a finer crackling.
Variations can be achieved by diluting the Elmer’s White Glue with up to ten parts water, but I’ve had varying success with this, so experimenting is the name of the game.
See more detailed instructions on how to use Elmers Glue for crackling.
Try mixing a small amount of glue with a few drops of water, paint it on, then allow to try for a few minutes, then dribble paint and use a damp brush to spread it. This will give the effect of more or less crackle.
Rust-Oleum Varathane Interior Crystal Clear Water-Based Poleurethane, Satin FinishThe crackle paint finish may not be the craze it once was, but it's a fun way to rustic up your crafts.
Use your crackle painted wood for rustic garden signs, twig handled trugs and barnboard hook boards with either twig hooks or rusty nails salvaged from other projects.
If you can find old square nails, so much the better.
You might like these
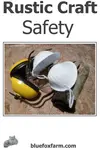
Rustic Craft Safety - stay safe, have fun
Rustic Craft Safety can mean the difference between having fun making garden crafts, or a trip to the emergency room; which would you choose?
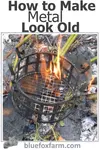
How to Make Metal Look Old - patina, tarnish and rust for garden art
Techniques and tips for artificially aging metal for rustic garden crafts, LARP, battle re-enactments and medievel projects; learn about patina, verdigris and how to make tin look aged
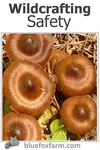
Wildcrafting Safety; use common sense when you're in the woods
Wildcrafting Safety is mostly common sense; what to take when you go into the woods for a wildcrafting expedition and how to stay safe...
If you're curious how broken pots, twigs and wire combine into magic, let's explore creativity in action.
Fill in the form below for your copy;
(Don't be disappointed - use an email address that will accept the free download - some .aol email addresses won't.
If you don't see your download within a few minutes, try again with another email address - sorry for the bother.)


Popular Posts You Can't Miss


Woman of Many Sticks - find out why I'm called that...
Join my e-mail group;
Sign up for the Rurality Newsletter here: (click on the bucket!)

Blue Fox Farm Home | About Me | Contact Me | Site Map | Privacy Policy | Copyright
Copyright © 2002- BlueFoxFarm.com All rights reserved

We acknowledge the traditional owners and custodians of the lands on which we live and work and pay our respects to elders past, present and future. Our business is created on the Mi’kmaq lands we call Epekwitk.