- Home
- Life In Miniature
- Dollhouse Miniature Projects
Jacki Cammidge is a Certified Horticulturist and rustic garden artisan with 30+ years creating twig trellises, archways, and hypertufa pieces from natural materials.
Dollhouse Miniature Projects
Rustic Cottage Chimney - Miniature Handicrafts
This tutorial will show how to make a very rustic accessory for a miniature scene or dollhouse - a chimney made of 'stone' which is really styrofoam, a very easy to work with material.

Use miniature handicrafts to make your own landscape or dolls house, scene or fairy garden.
I used the pink Styrofoam insulation for this, the one inch thick kind, but really almost any kind will do.
The beauty of Styrofoam is how versatile it is.
Not only can you shape it, but it takes paint as well, or as in the case of this chimney, glue sprinkled with sand gives it a completely realistic look.
Slicing it with a serrated knife is the easiest way to do the rough shaping, and finer work can be done with an Exacto knife. A rasp can take off the burrs, and sandpaper finishes it.
If you liked the look of more rounded stones, a small blow torch or butane lighter might give you enough melting to produce a very realistic effect.
Keep in mind that the little bits that shed off are extremely static and want to cling to everything. If this is an issue, keep a dryer sheet handy and wipe your hands on it periodically.

Cutting the shape of the chimney to make it in 'relief' or standing out from the background makes it more realistic.

The 'stones' are shaped with the end of a saw blade, or a screw will also work for this.
When the aim is to make it look rustic, it's not necessary to have it perfect. Leave the need for perfection behind.
A saw blade from a reciprocating saw worked well to cut out the stone shapes.

The final carved out shape is sealed with black acrylic paint, to stop the small debris from flaking off.

Each 'stone' is painted with a mix of white, silver and black to create the natural look of real stone.

Then the magic happens...
The chimney still needs something - how about mortar between the stones?
Here's how to take your miniature to the next level.
For mortar, the lines between the 'stones' are filled with slightly diluted Mod Podge using a syringe and the fine dry sand is sprinkled onto it.
A cheap veterinarian syringe is filled with Mod Podge or other white glue, and the lines around the stones are outlined.

Sand, garnered from the driveway - this is where you take what you can get. I sifted out the larger stones and bits of twigs.

Sprinkle it all over the glued chimney, making sure it goes in all the crannies that you glued earlier.

The excess is shaken off, and the piece is left to dry.
Next, the whole chimney will be glued to the recycled table to make a porch vignette, complete with firewood, an apple harvest and a tiny broom.
You might like these
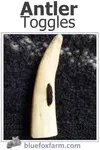
Antler Toggles - rustic and beautiful garment closures
Antler Toggles use some of natures most unique and interesting materials to make into handmade garment closures...
Treenware - primitive kitchen utensils & tableware
Treenware made from poplar trees is a way to add a primitive atmosphere to your kitchen and dining room; rustic kitchen utensils and tableware...
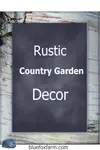
Rustic Country Garden Decor - add character - salvaged garden crafts
Add charm and character to your Rustic Country Garden Decor with garden crafts and rustic salvage...

 Jacki Cammidge
AUTHOR BIO
Jacki Cammidge is a Certified Horticulturist with a diploma in Ornamental Horticulture and the rustic garden artisan behind Woman of Many Sticks. Over 30+ years, she built custom twig trellises, archways, clematis gazebos, and 100+ hypertufa pieces using natural materials and upcycled finds. See her work on Facebook and Pinterest. Now retired, she still loves growing and harvesting willow.
If you're curious how broken pots, twigs and wire combine into magic, let's explore creativity in action.
Fill in the form below for your copy;
(Don't be disappointed - use an email address that will accept the free download - some .aol email addresses won't.
If you don't see your download within a few minutes, try again with another email address - sorry for the bother.)


Popular Posts You Can't Miss


Woman of Many Sticks - find out why I'm called that...
Join my e-mail group;
Sign up for the Rurality Newsletter here: (click on the bucket!)

Blue Fox Farm Home | About Me | Contact Me | Site Map | Privacy Policy | Copyright
Copyright © 2002- BlueFoxFarm.com All rights reserved

We acknowledge the traditional owners and custodians of the lands on which we live and work and pay our respects to elders past, present and future. Our business is created on the Mi’kmaq lands we call Epekwitk.