- Home
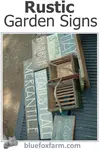
- Rustic Garden Signs
- How to Make Cloud Shape Signs
Jacki Cammidge is a Certified Horticulturist and rustic garden artisan with 30+ years creating twig trellises, archways, and hypertufa pieces from natural materials.
How to Make Cloud Shape Signs
DIY Tutorial
Sometimes you want something different for your garden art. This tutorial shows you how to make a cloud shape sign.
Jacki Cammidge, The Woman of Many Sticks, is a participant in the Amazon Services LLC Associates Program, an affiliate advertising program designed to provide a means for sites to earn advertising fees by advertising and linking to amazon.com. The cost to you, if you purchase something through my link, is the same.

I'm not a big fan of loud power tools, but using a jig saw, although a bit high on the vibration scale, isn't too scary.
I'm fortunate that I have a very competent carpenter to demonstrate how this is done.
I drew the lines on a piece of 1x6 planed lumber that I had; another advantage to having someone in the family that keeps scraps of siding and other salvage for me to use in crafts. It's not important if these have nail holes, that just adds to the character - which we want.
Make sure there are no nails or staples in the scrap lumber though. Nothing gets your helper cursing more than hitting a nail with the jigsaw.

The simple scallop shapes are easy to draw, even if you're not an artist.

The best tool for this job is a jigsaw with the ability to change the angle of the blade. This selection from Amazon gives you a lot of options of which jig saw to spend your hard earned money on.
Set the saw at a 45 degree angle. Starting at the top of each scallop, cut down to the valley.

Change the angle on the saw to 45 degrees the other way. Cut from the top of the scallops down to the valley on the other side.
 Notice the angle on the saw, this gives the 3D effect on the sign
This picture shows the angle of the saw; the flat plate actually can be moved to different angles. Using this method might take a bit of practice to get the cut even and clean - test on some scrap to get the curve and the angle correct.
 Sand the edges smooth, then paint, with white, grey and silver acrylic craft paint
Sand the edges and any rough spots, you may need a file to get into the corners to clean them up.
Then paint with your choice of exterior latex, or acrylic craft paints. You can see the method I've used for painting clouds here. That would give a more realistic appearance.
 Add lettering...
Add lettering - you can see more about the Boot Hill garden signs here.
 The cloud shape signs added to the sign post at Boot Hill
Boot Hill is the destination for these signs. See more about the junk garden here.
You might like these
Rustic Garden Signs - whimsical sayings to embellish your garden
Paint your Rustic Garden Signs with funny quotes and whimsical sayings to embellish your rustic garden...
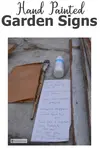
Hand Painted Garden Signs - witty and whimsical
How to make Hand Painted Garden Signs with witty and whimsical sayings and quotes...
The Gardener is 'In' Sign - a fun and witty decoration for your garden
The Gardener is 'In' or 'Out' Sign - use this to tutorial to make your own - you have my permission...

 Jacki Cammidge
AUTHOR BIO
Jacki Cammidge is a Certified Horticulturist with a diploma in Ornamental Horticulture and the rustic garden artisan behind Woman of Many Sticks. Over 30+ years, she built custom twig trellises, archways, clematis gazebos, and 100+ hypertufa pieces using natural materials and upcycled finds. See her work on Facebook and Pinterest. Now retired, she still loves growing and harvesting willow.
If you're curious how broken pots, twigs and wire combine into magic, let's explore creativity in action.
Fill in the form below for your copy;
(Don't be disappointed - use an email address that will accept the free download - some .aol email addresses won't.
If you don't see your download within a few minutes, try again with another email address - sorry for the bother.)


Popular Posts You Can't Miss


Woman of Many Sticks - find out why I'm called that...
Join my e-mail group;
Sign up for the Rurality Newsletter here: (click on the bucket!)

Blue Fox Farm Home | About Me | Contact Me | Site Map | Privacy Policy | Copyright
Copyright © 2002- BlueFoxFarm.com All rights reserved

We acknowledge the traditional owners and custodians of the lands on which we live and work and pay our respects to elders past, present and future. Our business is created on the Mi’kmaq lands we call Epekwitk.