Driftwood Mirror Frame
Who Is The Fairest Of Them All?
Jacki Cammidge, The Woman of Many Sticks, is a participant in the Amazon Services LLC Associates Program, an affiliate advertising program designed to provide a means for sites to earn advertising fees by advertising and linking to amazon.com. The cost to you, if you purchase something through my link, is the same.
Creatively using found items is an excellent way to add a unique touch to your home. One brilliant idea is to make a driftwood mirror frame. Besides the obvious aesthetic appeal, it also invokes a sense of peacefulness with its beachy, rustic vibe.

Creating a driftwood mirror frame can add a unique, rustic appeal to your home decor.
If you’re a fan of coastal or rustic decor styles, you'll love this project. And even if you're not, this can still be a fun and therapeutic DIY activity for a weekend. So, let’s explore how to create a driftwood mirror frame. Here’s how you can do it:
Material List for Your Driftwood Mirror
1. Mirror - you can ask a glass shop for a piece in whatever size you like, and they'll cut it for you. You can use tile cutters if you want to make it into an interesting shape.
2. Plenty of driftwood pieces (variety of shapes and lengths)
3. Strong adhesive (e.g., E6000, construction adhesive) or glue gun and hot glue sticks
4. Backboard (optional: plywood or similar material)
5.Clamps or heavy objects
6.
Picture hanging hardware
7. Sandpaper
8. Sealant (clear polyurethane or similar)
9. A drop cloth or newspapers
 This imaginative design reflects the ocean
Steps to Create Driftwood Mirror Frame
Before you start the project, ensure you have all your safety gear, such as gloves, safety glasses, and work in a well-ventilated workspace.
Step 1: Gather and Prepare Pieces of Driftwood
Begin by collecting pieces of driftwood. You need a variety of sizes and lengths, and the quantity will depend on the size of your mirror. Ensure the pieces are clean and dry before starting the project. Lots of us have a driftwood collection curated over months or years of visiting the beach.
Once you’ve collected your driftwood, lay it out on your work surface. It is best if you have a mix of thin, thick, long, and short pieces. Size and shape diversity will contribute to the mirror's overall aesthetic appeal.
Arranging your pieces beforehand also helps you get a clear picture of what the final product may look like. Feel free to scale your driftwood pieces using sandpaper for a smoother fit.
Step 2: Prepare your Mirror
If your mirror doesn't already have a frame, considering adding a plywood backboard, similar in size to the mirror. This will provide support to the mirror and make it easier to glue the driftwood.
Step 3: Adhere Driftwood to Mirror Frame
Now it's time to start crafting your driftwood mirror frame. Begin by adhering the larger pieces of driftwood around the edges of the mirror or the backboard with your adhesive. For a more rustic appeal, let pieces overhang the mirror's edge slightly.
Next, fill in between the larger pieces with the smaller pieces, making sure to cover all areas. The goal is to create a mosaic of driftwood, filling in the gaps as much as possible for a cohesive appearance.
Allow the glue to dry fully according to the manufacturer's instructions before moving on to the next step.
 Driftwood pieces with patina and weathering
Step 4: Apply Finish
Once you’ve created the mirror frame and the adhesive has dried, finish the project by applying a sealant to the driftwood. This will not only enhance the visual appeal but will also ensure your driftwood mirror frame is protected from wear and tear.
Step 5: Install Hanging Hardware
Before hanging the mirror on the wall, it's crucial to add proper hanging hardware at the back of the mirror frame. Make sure it’s securely fastened so that your gorgeous driftwood mirror frame hangs safely.
And there you have it! A simple, easy-to-follow guide on how to create a driftwood mirror frame. This unique décor piece can transform any space with its rustic appeal, giving your interior a warm, nature-inspired touch.
Above all, it will be a piece that reflects your creativity and skill, and the sense of accomplishment you feel upon completing this project will undoubtedly match the mirror's beauty. So why wait? Find those driftwood pieces and start creating your masterpiece today!
TLDR:
1. Start by determining the size of your frame. Measure your mirror and then decide how thick you want your frame to be. Cut your wood back board to the appropriate size.
2. Clean and dry your driftwood. If your pieces have a lot of dirt, you may want to scrub them with water and a stiff bristle brush and leave them out to dry.
3. Arrange your driftwood pieces around your mirror. Try out different combinations until you find an arrangement you love. Remember, the beauty of a driftwood mirror lays in its irregularity and natural look.
4. Once you're happy with your layout, start gluing the pieces down one by one with hot glue gun onto the mirror. Be generous with the glue to ensure that each piece is well secured.
5. If some pieces are a little uneven, you may need to layer driftwood in certain areas to create an even surface.
6. Allow your mirror to dry completely, at least 24 hours.
7. Once everything is completely dry, turn the mirror frame face down. Attach the picture hanging hardware on the back of the board.
8. Once you hang your mirror, step back and admire your unique, handmade driftwood mirror frame.
Remember to always take caution when dealing with glass, sharp tools and hot glue. Enjoy creating your DIY driftwood mirror frame!
You might like these
Punched Tin Lamp Shades; from simplicity to gorgeous in minutes
Add some charm and character to your porch, an old rustic shed or even in your house with a Punched Tin Lamp Shade
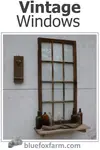
Vintage Windows; repurposing old windows for garden crafts
Use your old Vintage Windows for refurbishing into some unique and unusual garden crafts; plant them with succulents or make a tiny rustic greenhouse to display ferns or violets in...
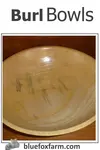
Burl Bowls - reveal the beauty within
Reveal the beauty within the burl with a Burl Bowl; nature seldom makes a mistake, and there is always a silver lining...

If you're curious how broken pots, twigs and wire combine into magic, let's explore creativity in action.
Fill in the form below for your copy;
(Don't be disappointed - use an email address that will accept the free download - some .aol email addresses won't.
If you don't see your download within a few minutes, try again with another email address - sorry for the bother.)


Popular Posts You Can't Miss


Woman of Many Sticks - find out why I'm called that...
Join my e-mail group;
Sign up for the Rurality Newsletter here: (click on the bucket!)

Blue Fox Farm Home | About Me | Contact Me | Site Map | Privacy Policy | Copyright
Copyright © 2002- BlueFoxFarm.com All rights reserved

We acknowledge the traditional owners and custodians of the lands on which we live and work and pay our respects to elders past, present and future. Our business is created on the Mi’kmaq lands we call Epekwitk.