- Home
- Rustic Paint Techniques
- Painting Trees
Jacki Cammidge is a Certified Horticulturist and rustic garden artisan with 30+ years creating twig trellises, archways, and hypertufa pieces from natural materials.
Painting Trees
Tips and Tutorials for the Arboreally Fixated
Jacki Cammidge, The Woman of Many Sticks, is a participant in the Amazon Services LLC Associates Program, an affiliate advertising program designed to provide a means for sites to earn advertising fees by advertising and linking to amazon.com. The cost to you, if you purchase something through my link, is the same.
I'm addicted to trees. I have been forever. I have pictures of myself at about eight years old, sitting among a whole grove of muscular beech trees in England.

As a person who grew up to be immersed in the study of plants, it's not really a surprise that trees were my first addiction.
I love the trees, and the leaves, and the seeds and cones they produce.
Learning how to paint them is just one more aspect of it.
Allan Dunfield is a master of trees. I bow to his superior talent.
I asked for a few boards to be cut so I could paint on them.
Plywood, in the manufacturing process, sometimes has knot holes in the thin 'ply's. I put these to good use as texture - they're perfect for building right in to the tree.
Any type of wood, even if it's very weathered, works for painting trees. So don't discard lumber that's been out in the rain, snow and sun - it's perfect for this.
The first step is to sand off any rough spots around the edges.
Then, I paint on a coat of black or white to seal the wood - in this case, the plywood is old and already weathered - that's fine for this type of painting, no need for it to be smooth.
Then the fun begins; this is the start of many layers of different colors of acrylic paint. I paint the background first, then move forward.
This makes it possible to use the technique called 'perspective' where objects (in this case the mountains and trees) are painted with finer brushes and sponges.
Moving closer to the viewer, the trees and other shrubbery gets more detailed.
Eventually, the trees in the foreground are painted, with all the fine detail of the branches and twigs.
I've use similar techniques on other projects, like this one and here.
One of the most important parts is the shadows and the light where it hits one side and the top of objects.
Decide where this light is coming from, and create the shadows on the opposite side. This has to be consistent to give a realistic look.
As a funny little final touch, I put eyes in the holes in the trees - the name of this set of paintings is 'Owls'.
The painting of this type of art takes many layers to complete. Once it's finished, there are still steps to take.
A coat of urethane to protect the painting and make it easier to dust and clean is the next thing.
Then some kind of frame (twigs, maybe?) and a way to hang it up that doesn't show.
I like the system where a hole is drilled (this is what plywood is made for) and the art work hangs from a screw in the wall.
Other options are to use those little metal holders, and attach them with the tiny screws that they come with.
The apple doesn't fall far; my nine year old grandson is a very good artist - and guess what his most painted subject is?
Not only is he amazing at art, he's also been published.
My daughter sends me Christmas cards made from his paintings. I always look forward to them and keep them in my cherished art place.
You might like these
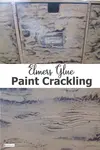
Elmers Glue Paint Crackling; how to paint rustic look
A tutorial on using this cheap (er, economical) method of creating that rustic look on everyday items for your home and garden; Elmers Glue Paint Crackling
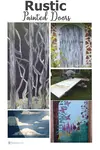
Rustic Painted Doors - make your door unique
Make a unique opening for your dwelling or shed; Rustic Painted Doors...
Allan Dunfield - British Columbia Artist
West Coast Artist Allan Dunfield...

 Jacki Cammidge
AUTHOR BIO
Jacki Cammidge is a Certified Horticulturist with a diploma in Ornamental Horticulture and the rustic garden artisan behind Woman of Many Sticks. Over 30+ years, she built custom twig trellises, archways, clematis gazebos, and 100+ hypertufa pieces using natural materials and upcycled finds. See her work on Facebook and Pinterest. Now retired, she still loves growing and harvesting willow.
If you're curious how broken pots, twigs and wire combine into magic, let's explore creativity in action.
Fill in the form below for your copy;
(Don't be disappointed - use an email address that will accept the free download - some .aol email addresses won't.
If you don't see your download within a few minutes, try again with another email address - sorry for the bother.)


Popular Posts You Can't Miss


Woman of Many Sticks - find out why I'm called that...
Join my e-mail group;
Sign up for the Rurality Newsletter here: (click on the bucket!)

Blue Fox Farm Home | About Me | Contact Me | Site Map | Privacy Policy | Copyright
Copyright © 2002- BlueFoxFarm.com All rights reserved

We acknowledge the traditional owners and custodians of the lands on which we live and work and pay our respects to elders past, present and future. Our business is created on the Mi’kmaq lands we call Epekwitk.