- Home
- Rustic Garden Projects
- Twig Picket Fence
Jacki Cammidge is a Certified Horticulturist and rustic garden artisan with 30+ years creating twig trellises, archways, and hypertufa pieces from natural materials.
Twig Picket Fence
A Classic Design, with a Rustic Twist
Twig picket fences are some of the easiest rustic twig fences to make, depending only on a large supply of twigs, some wire, and a way of stringing wire between two poles or two trees.

I use metal rods or even salvaged bed frames cut to size and pounded into the ground.
You may be able to do this too, depending on the type of soil and if it will hold the post.
Sometimes you’ll need a diagonal brace to prevent the post from leaning.
String the wire between the rods and use these to support the upright twigs.
The wire between each picket is twisted together to leave a space.
Supplies you’ll need for your twig picket fence:
- Support wire from power lines – this comes with several wires plied together, which have to be untwisted. This page on wire techniques for crafts will show you how to untwist recycled wire.You can use galvanized fence wire, or even stainless steel wire for electric fencing. This will be the support for the twigs, and run parallel to the ground.
- Tie wire – black malleable wire used for tying re-bar in concrete work. This is for attaching the twigs.
- Many,
many twigs – these will be attached only a few centimeters apart –
anywhere from 5-15cm (2-5").
In length, they should be 40-80cm (18-36") long, and any thickness.
You can make a pattern copying any type of old time wooden picket fence; try a scalloped top, or arched, or even just alternate taller and shorter twigs or simply use them randomly.
Install your posts, whichever you have chosen.
Don’t try and make your panels longer than 4-5 meters (18') apart, as it will sag and stretch too much. If you string one end of the wire from each leg of a twig archway attach the other end to the post or tree.
I attach two of the support type of wire; one at about knee height, and then another at hip height.
Attaching the twigs is easy, but it takes a lot of wire.
Once the first few twigs are attached, you’ll get faster at it. I simply wind the tie wire around the support wire, then around the twig, around the support wire, around the next twig.
Soon, you’ll have all the twigs attached to the top wire, and you can go to the bottom one and repeat. The twigs should be relatively parallel to each other, but some variation is fine. It simply adds to the ambiance of rusticity.
I’ve used a similar method to make twig lattice fences and twig palisade fences as well.
You might like these
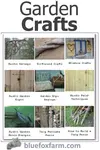
Garden Crafts - embellish your garden with whimsy, charm & character
Garden Crafts made from trash recycled into treasure, thrift store finds and rustic art embellish your rustic garden with whimsy, charm and character
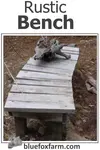
Rustic Bench - how to build your perfect twig and barnboard seat
A Rustic Bench in just the right spot will be a regular stopping point in your garden; enjoy the songs of birds, buzzing bees and flitting butterflies from your twig and barnboard seat...
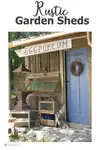
Rustic Garden Sheds - from the funky to the sublime
Rustic Garden Sheds are the perfect accessory to your garden; not only a functional place to keep your tools, but a well appointed sanctuary for the gardener...
 Jacki Cammidge
AUTHOR BIO
Jacki Cammidge is a Certified Horticulturist with a diploma in Ornamental Horticulture and the rustic garden artisan behind Woman of Many Sticks. Over 30+ years, she built custom twig trellises, archways, clematis gazebos, and 100+ hypertufa pieces using natural materials and upcycled finds. See her work on Facebook and Pinterest. Now retired, she still loves growing and harvesting willow.
If you're curious how broken pots, twigs and wire combine into magic, let's explore creativity in action.
Fill in the form below for your copy;
(Don't be disappointed - use an email address that will accept the free download - some .aol email addresses won't.
If you don't see your download within a few minutes, try again with another email address - sorry for the bother.)


Popular Posts You Can't Miss


Woman of Many Sticks - find out why I'm called that...
Join my e-mail group;
Sign up for the Rurality Newsletter here: (click on the bucket!)

Blue Fox Farm Home | About Me | Contact Me | Site Map | Privacy Policy | Copyright
Copyright © 2002- BlueFoxFarm.com All rights reserved

We acknowledge the traditional owners and custodians of the lands on which we live and work and pay our respects to elders past, present and future. Our business is created on the Mi’kmaq lands we call Epekwitk.