Driftwood Window Box
Weathered Wood, Reimagined
This kind of project gives lots of options for attaching the driftwood, depending on what that driftwood looks like, how thick it is, how long and so on.

Some window boxes made from driftwood might be a simple plywood base box, with short pieces attached in a pattern or flowing shape.
This would be a good way to use shorter driftwood twigs.
If you're lucky enough to find an old boat that's got away from it's mooring and been shattered by a storm, this could give you a lot of long pieces with rounded ends.
If they're too long for your box design, cut the middle of the piece and join it when you attach it, then put a unique piece on the join in the middle to hide it.
 Salvaged rowboat, ready to reimagine
To make the base box, use 1/2" or 3/4" plywood. Cut your long sides (the back and the front) then decide how deep to make it.
Some of this depends on the size of your plywood - if you can, try to make it uniform so you can duplicate it easily. I'll bet you'll want more than one.
When it's all put together, add your driftwood. If they are shorter pieces, first lay them on to see how they fit. If they overlap the ends, that's fine. If they don't, you may want to paint the plywood first so it doesn't show as much.
I like painting the background black, so it looks like shadows. Then the driftwood applied to it will pop.
Ardox (twist) nails work well for applying the driftwood, but use a drill the same size as the nail to drill a pilot hole to prevent the wood from splitting.
You could also apply the driftwood from the back so the attachment doesn't show. This might require you to first glue the pieces onto the plywood so they won't move when you go to attach them.
So now your driftwood window box is completed, line it with poly film (black plastic garbage bag), slash it in a few places to allow drainage, fill it with your soil mix, and plant away.
I recommend you set the window box in place before doing this, and only water at the very end as it will be too heavy to lift.
See another way to make a pickled window box using giggle juice to give the impression of age and weathering.
You might like these
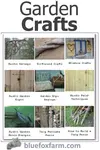
Garden Crafts - embellish your garden with whimsy, charm & character
Garden Crafts made from trash recycled into treasure, thrift store finds and rustic art embellish your rustic garden with whimsy, charm and character
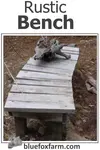
Rustic Bench - how to build your perfect twig and barnboard seat
A Rustic Bench in just the right spot will be a regular stopping point in your garden; enjoy the songs of birds, buzzing bees and flitting butterflies from your twig and barnboard seat...
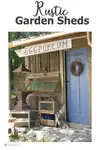
Rustic Garden Sheds - from the funky to the sublime
Rustic Garden Sheds are the perfect accessory to your garden; not only a functional place to keep your tools, but a well appointed sanctuary for the gardener...
If you're curious how broken pots, twigs and wire combine into magic, let's explore creativity in action.
Fill in the form below for your copy;
(Don't be disappointed - use an email address that will accept the free download - some .aol email addresses won't.
If you don't see your download within a few minutes, try again with another email address - sorry for the bother.)


Popular Posts You Can't Miss


Woman of Many Sticks - find out why I'm called that...
Join my e-mail group;
Sign up for the Rurality Newsletter here: (click on the bucket!)

Blue Fox Farm Home | About Me | Contact Me | Site Map | Privacy Policy | Copyright
Copyright © 2002- BlueFoxFarm.com All rights reserved

We acknowledge the traditional owners and custodians of the lands on which we live and work and pay our respects to elders past, present and future. Our business is created on the Mi’kmaq lands we call Epekwitk.