- Home
- Rustic Home Decor
- Rustic Farmhouse Table
Jacki Cammidge is a Certified Horticulturist and rustic garden artisan with 30+ years creating twig trellises, archways, and hypertufa pieces from natural materials.
Rustic Farmhouse Table
Showing Age and Distressing
I've had this little kitchen table around for ages, and never did anything with it.

That changed, a few months ago. It had been left outside for the past two winters, gradually getting more and more beat up.
 Little vintage kitchen table
At some point, I had tried to strip it, but the paint was so gluey and thick that I gave up (hence being abandoned to the weather).
I used it for displays out in the garden, but then when Hubby arrived with some cedar boards on the wheelbarrow, ready to cut them up for kindling, I stepped in. The original top was removed, leaving this;
 Top removed from the table - is it worth it?
He had a thought that a piece of plywood would be just the thing, and that the cedar 2x6 boards were too thick. I begged to differ.
I think the phrasing I used was something like; sure, you can put a piece of plywood on it, and sell it for ten bucks. But if we put the boards on, distress them and paint them, we will get $110.
So, grudglingly, he set to and attached the cedar. The way the table was constructed was interesting, with angled pieces to tighten up the legs, which was a good thing, as they were loose.
 Trying out the look of the cedar boards on the base.
Then he placed a batten on the bottom of all the boards and glued them together. I would probably omit the glue next time, and just let it be a rustic and weathered piece.
Hubby has a hard time letting go of perfection, and being a meticulous carpenter, using the techniques I use to create a rustic piece is hard for him. He got through it though!
 The legs are painted. Note the pocket holes to attach the top.
While he was waiting for the glue to dry, I painted the base, with those gorgeous turned legs, in a metallic, charcoal grey craft paint in acrylic.
It's not something I would normally have done, but it was the only craft paint at the dollar store. The color was achieved by mixing black paint with a small amount of white of the same kind of metallic craft paint. This produced the lovely soft grey.
 The assembled top, distressed and finished.
Then with the top assembled, the beating commenced. Using various implements like a hammer, a cobblers last and a chain, we banged it up and made judicious dents in the top.
The next step was to paint it with my usual craft paint, in black. After it was dry, it was sanded off with an electric sander.
This revealed the grain and allowed the dents and distressing to show, highlighted by the black paint.
The final step was the urethane. We used a water based product for easy clean up, and several coats later, it was ready to reveal to the general public.
It sold within hours of listing it, to a person renovating an old farmhouse. And yes, we got the full asking price of $110.
For a different kind of project, check out the driftwood dining table.
Rustic French Country Table - Another Project
We needed a table for our new place, which has a slightly cramped kitchen, and decided to go a different route, with purchased legs from Etsy. These were specially custom turned by a seller in Turkey, of all places.
 French Country Farmhouse Table Legs from Turkey
The top was all ready when the legs arrived, all glued together, just waiting for assembly.
The legs were unfinished beech wood, so after giving them a paint job with latex interior paint, they got a light coat of darker acrylic craft paint, diluted with water.
 Distressing before painting, as well as after, gives this French country style table a weathered look
The wash was wiped off with a rag, leaving the turned sections with more definition.
 Rustic Table, used for photo sessions of old things and new. These door handles will be going on my old window greenhouse
The top was distressed by throwing chains on it, and hitting it with implements like hammers. We had fun doing this, both before painting, and after, to give it a true weathered finish.
Now it's my go-to for photo sessions, as well as for eating at.
 Rustic French Country Table
I enjoy having a table that doesn't need care. A quick wipe with a cloth is all that's required - no wax or other cleaner, just the occasional sanding with rough sandpaper to take off even more of the finish.
The completed size of this little French country style table is 2'x4', or 60cm x 120cm.
You might like these
Punched Tin Lamp Shades; from simplicity to gorgeous in minutes
Add some charm and character to your porch, an old rustic shed or even in your house with a Punched Tin Lamp Shade
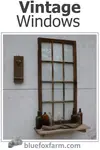
Vintage Windows; repurposing old windows for garden crafts
Use your old Vintage Windows for refurbishing into some unique and unusual garden crafts; plant them with succulents or make a tiny rustic greenhouse to display ferns or violets in...
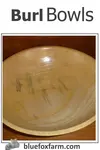
Burl Bowls - reveal the beauty within
Reveal the beauty within the burl with a Burl Bowl; nature seldom makes a mistake, and there is always a silver lining...

 Jacki Cammidge
AUTHOR BIO
Jacki Cammidge is a Certified Horticulturist with a diploma in Ornamental Horticulture and the rustic garden artisan behind Woman of Many Sticks. Over 30+ years, she built custom twig trellises, archways, clematis gazebos, and 100+ hypertufa pieces using natural materials and upcycled finds. See her work on Facebook and Pinterest. Now retired, she still loves growing and harvesting willow.
If you're curious how broken pots, twigs and wire combine into magic, let's explore creativity in action.
Fill in the form below for your copy;
(Don't be disappointed - use an email address that will accept the free download - some .aol email addresses won't.
If you don't see your download within a few minutes, try again with another email address - sorry for the bother.)


Popular Posts You Can't Miss


Woman of Many Sticks - find out why I'm called that...
Join my e-mail group;
Sign up for the Rurality Newsletter here: (click on the bucket!)

Blue Fox Farm Home | About Me | Contact Me | Site Map | Privacy Policy | Copyright
Copyright © 2002- BlueFoxFarm.com All rights reserved

We acknowledge the traditional owners and custodians of the lands on which we live and work and pay our respects to elders past, present and future. Our business is created on the Mi’kmaq lands we call Epekwitk.