
Get the e-Book
Come into the garden and find some twigs - then, let's build! They can be rugged and rough, or more refined and smooth.
Whatever they look like, there's a craft for that.
- Home
- Rustic Garden Projects
- Junk Gardening
- Terracotta Fairy Garden
Terracotta Fairy Garden
Oh no! You broke it! But the pieces on the floor could be the start of something amazing.
It seems such a shame when the cat knocks over your favorite terracotta clay pot; the pieces just never seem to go back together.

Another way that these pots accidentally get broken is by exposure to freezing weather, while they are full of wet soil. The type of clay used to make these pots is not frost proof.
Not to worry; use the broken pot to create a garden for those elusive fairies in your area.
They will love to see what you make out of an otherwise unusable pot.
Stack them into a tower, overgrown with tiny plants. Snuggle in some patio furniture that fits the scale. Add a fence made from slender willow sticks.
Lots of garden centers are getting in on this trend by offering a mother daughter fairy garden workshop - what better way to have a bonding experience?
 A collection of cracked and broken Terracotta pots
Collect the pieces carefully, because of the sharp edges.
Fairy Garden Furniture and Accessories
Mail order fairy garden furniture, fences and trellises add that special something to your creation. Look for these online, or make your own out of twigs glued together. A tiny fence, a gazebo, or little chairs would all be so adorable.
These gem-like gardens don't require a lot of effort; keep your eyes open for the broken pots, a bit of gravel sifted from your walkways, and some tiny plants.
Miniature paths (you knew the flat pebbles you collected on trips to the beach would come in handy one day, right?) and patios - especially with tiny plants like Elfin thyme or little species of Sedum flowing over the edges to give it a finished look.
My Fairy Garden, in Multiple Tiers
I used this fabulous big clay planter for the base layer of the multiple tiers - it's got a big crack in it, but has so far survived a couple of winters without breaking.
The other two smaller pots are cracked too, and then one did completely come apart.
Some of the better quality Italian clay pots withstand more cold temperatures than others, but none of them will stand up to being dropped.
 Partially fill the bottom one with soil, and start stacking!
Starting with the base one, fill it about halfway with potting soil - I used Sunshine mix #4, because of the fact that it's sterile, and lightweight and porous too. Pack it down around the base of the next pot to be layered, so it doesn't fall over.
Gradually stack up the other pots, making sure to pack down the soil to hold them in place. As the plants root in, they'll help hold them too.
 Add miniature plants and a bit of gravel for pathways
It's amazing how miniature gardens can take on a life of their own; this reminds me of a ruined castle, with the gravel pathways, and tiny plants.
These are all Sempervivum arachnoideum, some Sedum populifolium for bushes or trees, and a couple of different and tiny Sedum species. As they grow and fill it, maybe I'll add some stones to make it look even more rugged and antique.

See more great ideas and inspiration here;
Update April 2016
Then, the winter of 2015 struck, and so did disaster!
Remember how I mentioned the large pot on the bottom?
It cracked and broke completely, but owing to the good root formation of the plants, the rest of the planting stayed upright.
Time to rejuvenate it!
 Terracotta Fairy Garden disaster...or is it?
You might like these
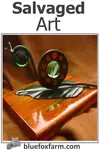
Salvaged Art; interesting junque, reimagined into artistic pieces
Salvaged Art is a way to pay homage to worn out rusty junque, odd pieces of trash which are rescued from the landfill and make them into gorgeous funky art pieces for your garden...
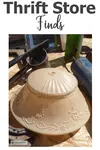
Thrift Store Finds; don't hesitate - grab those hidden treasures
Thrift Store Finds are only one of many ways to add to your collection of intriguing junk to make into garden crafts; don't hesitate though, those hidden treasures won't wait...
Strange Artifacts can be found all around us
What Strange Artifacts have you come across in your travels; whether they are found in basements, attics, old barns, ask about them here...

If you're curious how broken pots, twigs and wire combine into magic, let's explore creativity in action.
Fill in the form below for your copy;
(Don't be disappointed - use an email address that will accept the free download - some .aol email addresses won't.
If you don't see your download within a few minutes, try again with another email address - sorry for the bother.)


Popular Posts You Can't Miss


Woman of Many Sticks - find out why I'm called that...
Join my e-mail group;
Sign up for the Rurality Newsletter here: (click on the bucket!)

Blue Fox Farm Home | About Me | Contact Me | Site Map | Privacy Policy | Copyright
Copyright © 2002- BlueFoxFarm.com All rights reserved

We acknowledge the traditional owners and custodians of the lands on which we live and work and pay our respects to elders past, present and future. Our business is created on the Mi’kmaq lands we call Epekwitk.